

Overview
A customer profile allows you to customize the conversation Apten has with a specific type of lead. Each customer profile can be thought of as a specific persona. For example, in real estate, some example customer profiles would be ‘Buyer’, ‘Renter’, or ‘Seller’.How Customer Profiles work
There are 3 main components to a customer profile to setup:- Profile description: share context with Apten on who it’s talking to
- Conversational flow: define exactly how you want the AI to communicate with the lead depending on their responses
- Follow-up config: customize the timing and manner in which Apten automatically follows up
1. Profile Description
This is where you give Apten info about the specific type of lead it’s talking to (example below). You can also share specific instructions or info that Apten should know about that lead.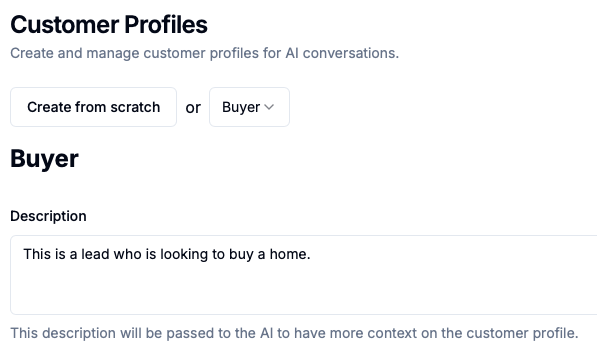
2. Conversational Flow
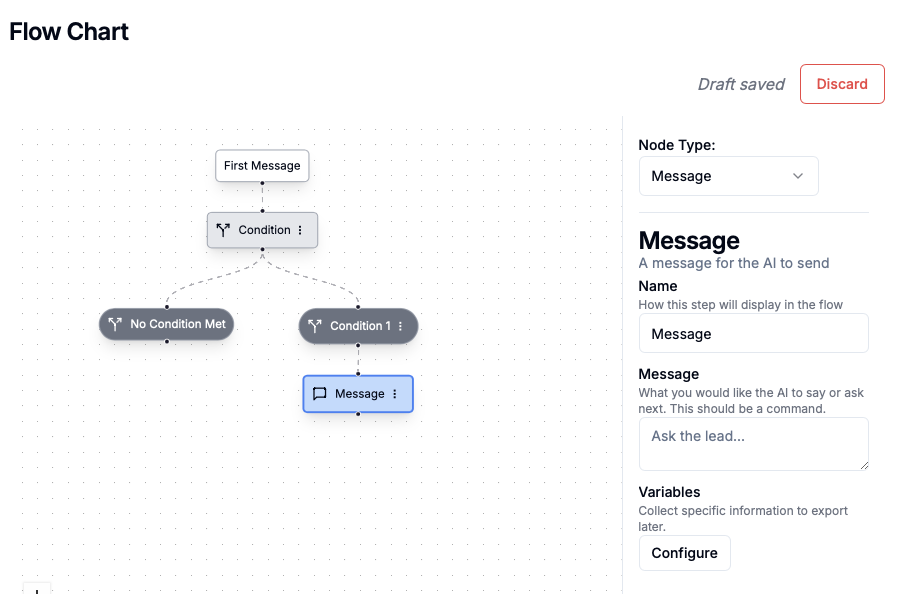
This is the most important part of the customer profile, since it is how Apten’s entire conversation with a lead is structured. A conversational flow is composed of nodes that are connected together. There are 3 main types of nodes:- Message node: instruct Apten what to say at each stage in the conversation
- Condition node: describe the types of responses from the lead you want Apten to look for
- Webhook node: connect Apten to an external system/API at a specific point in the convo
Message node
-
Each message node can be thought of as an independent AI agent that is trying to accomplish a specific objective. You customize the agent in each message node with a prompt/set of instructions.
- For example: ‘Introduce yourself to the lead and ask if they are still looking for an apartment’
-
Objectives for each message node are typically automatically determined by the prompt you give it, but you can also give each message node a specific objective to accomplish.
- For example: Your objective is not complete until the lead has indicated whether or not they are looking for an apartment.
-
If the lead asks an off-topic question unrelated to what Apten asks or says in a message node, Apten will automatically address their question/issue first based on what it has in custom knowledge, but will then guide the lead back on topic to its original objective.
-
For example:
- Lead: How did you get my information again?
- Apten: You filled out a lead form on our website inquiring about apartments in San Francisco - are you still looking?
-
For example:
-
Variables
- Apten can dynamically set variables in message nodes. Variables are set as either a string, number, or boolean. Each variable is set based on a description in English that you give.

-
Apten is able to reference variables dynamically in its messages.
- For example: Tell the lead ‘Hey (firstName), this is (yourName) from Bob’s Real Estate Company. Are you still looking for apartments in (city)?’
Condition Node:
-
A condition node is a description in English of the type of response you are looking for from a lead after a message node.
-
For example:
- Apten asks if lead is looking for an apartment in a message node
- Definition of a condition node after: ‘Lead indicates in any sort of way that they are still looking for an apartment/rental’
-
For example:
- Condition nodes are created by dragging the dot below a message node down and then selecting condition node on the top right. You can also add more than one node in a condition node tree.
Webhook Node:
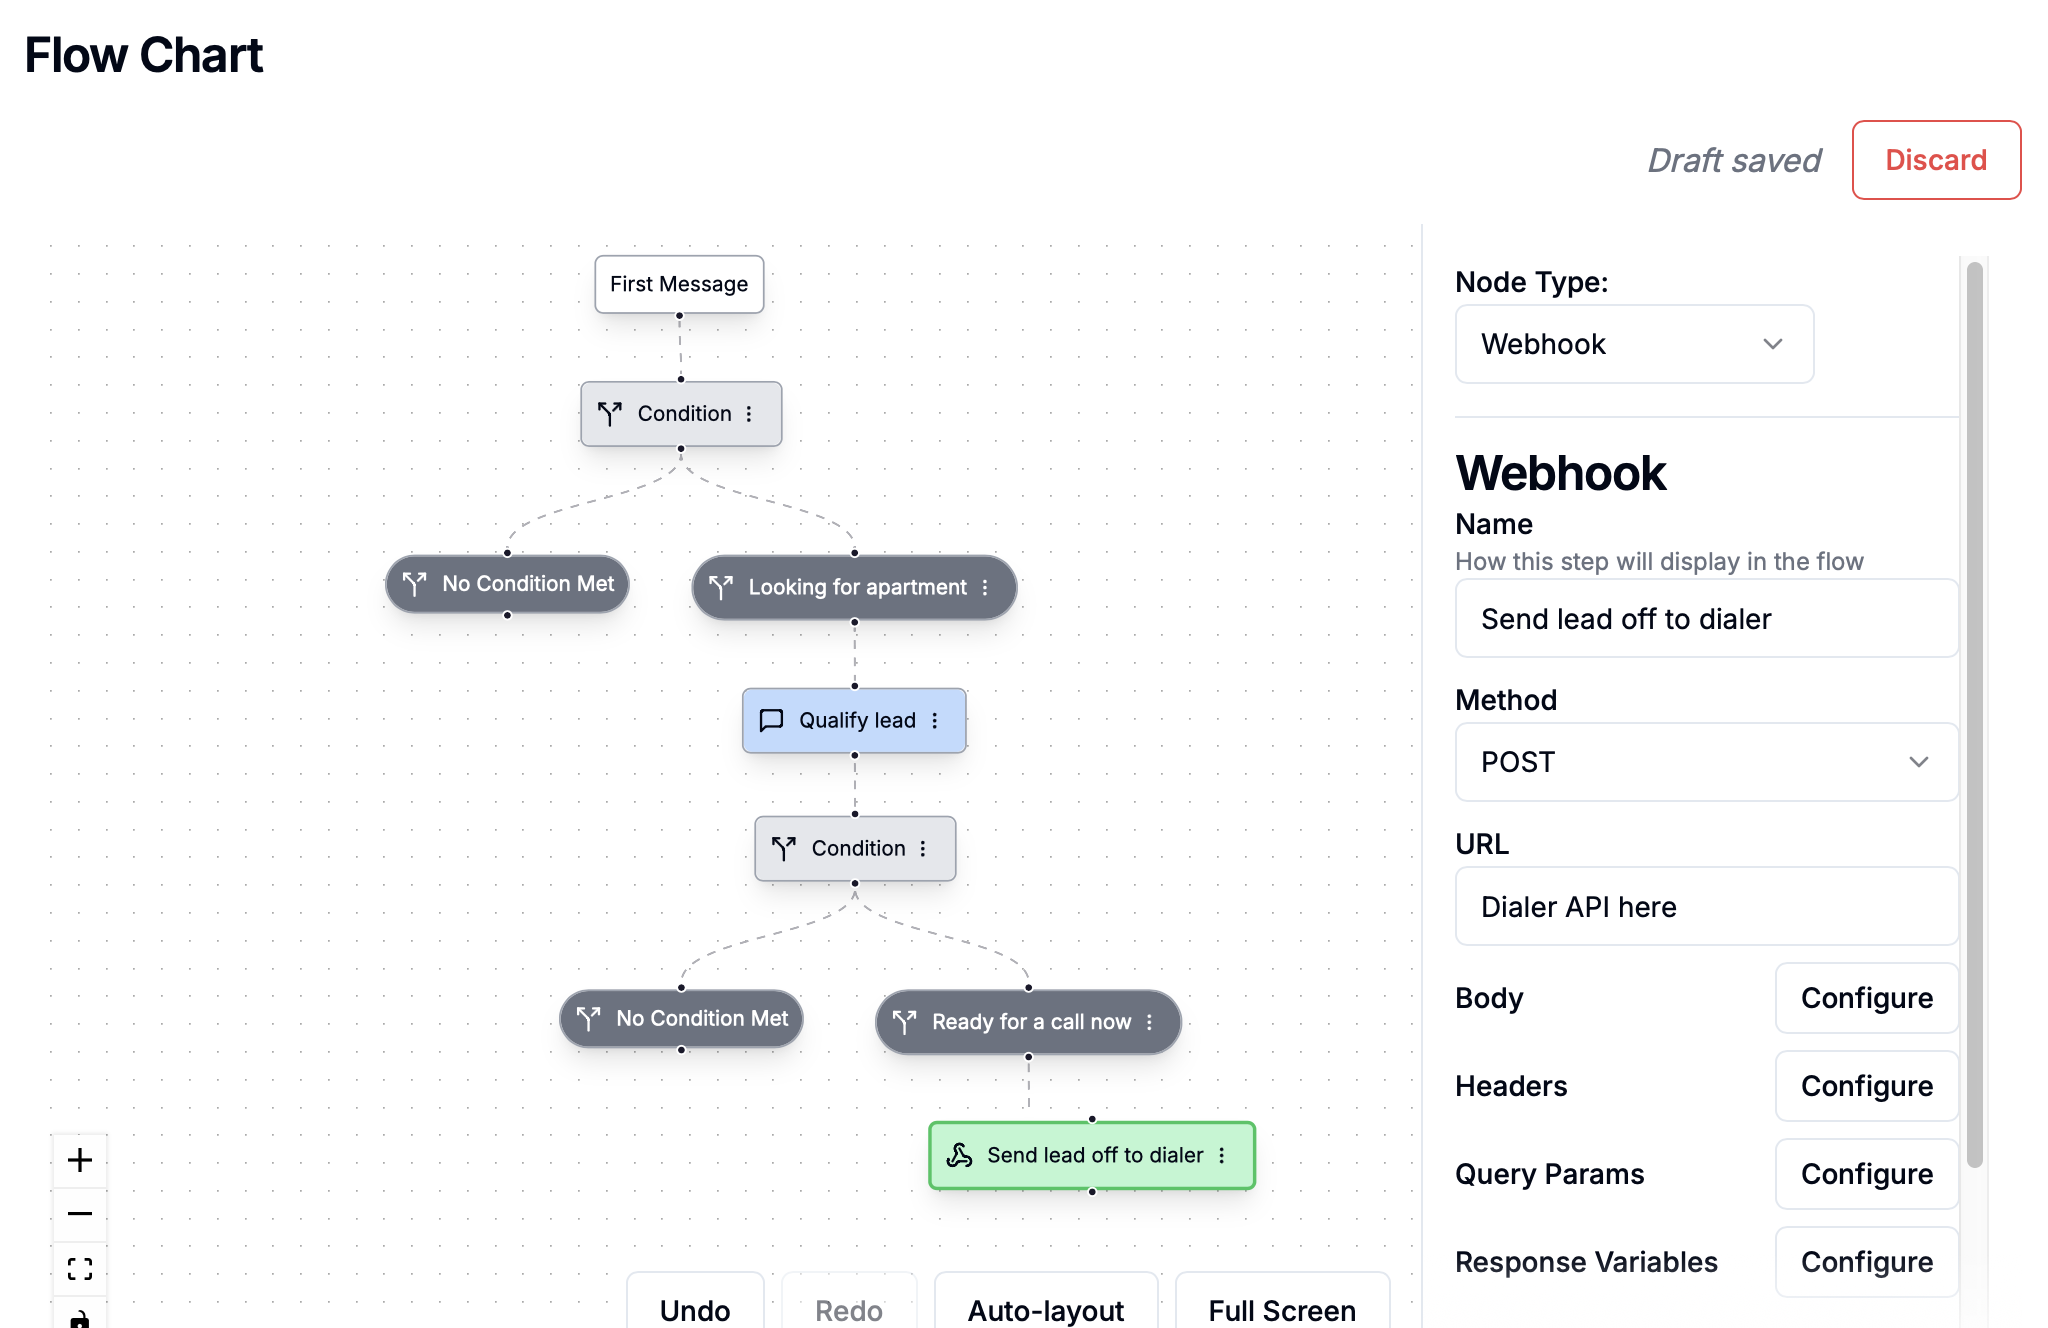
A webhook node allows Apten to connect to an external system/API at a particular point in the conversation to either take an action or pull in relevant info. See image below for webhook node parameters. Important note: You can pass in variables Apten has collected in a previous message node to the Body or Query Params in the webhook, you just need to reference them with double brackets. For example, {{city}}.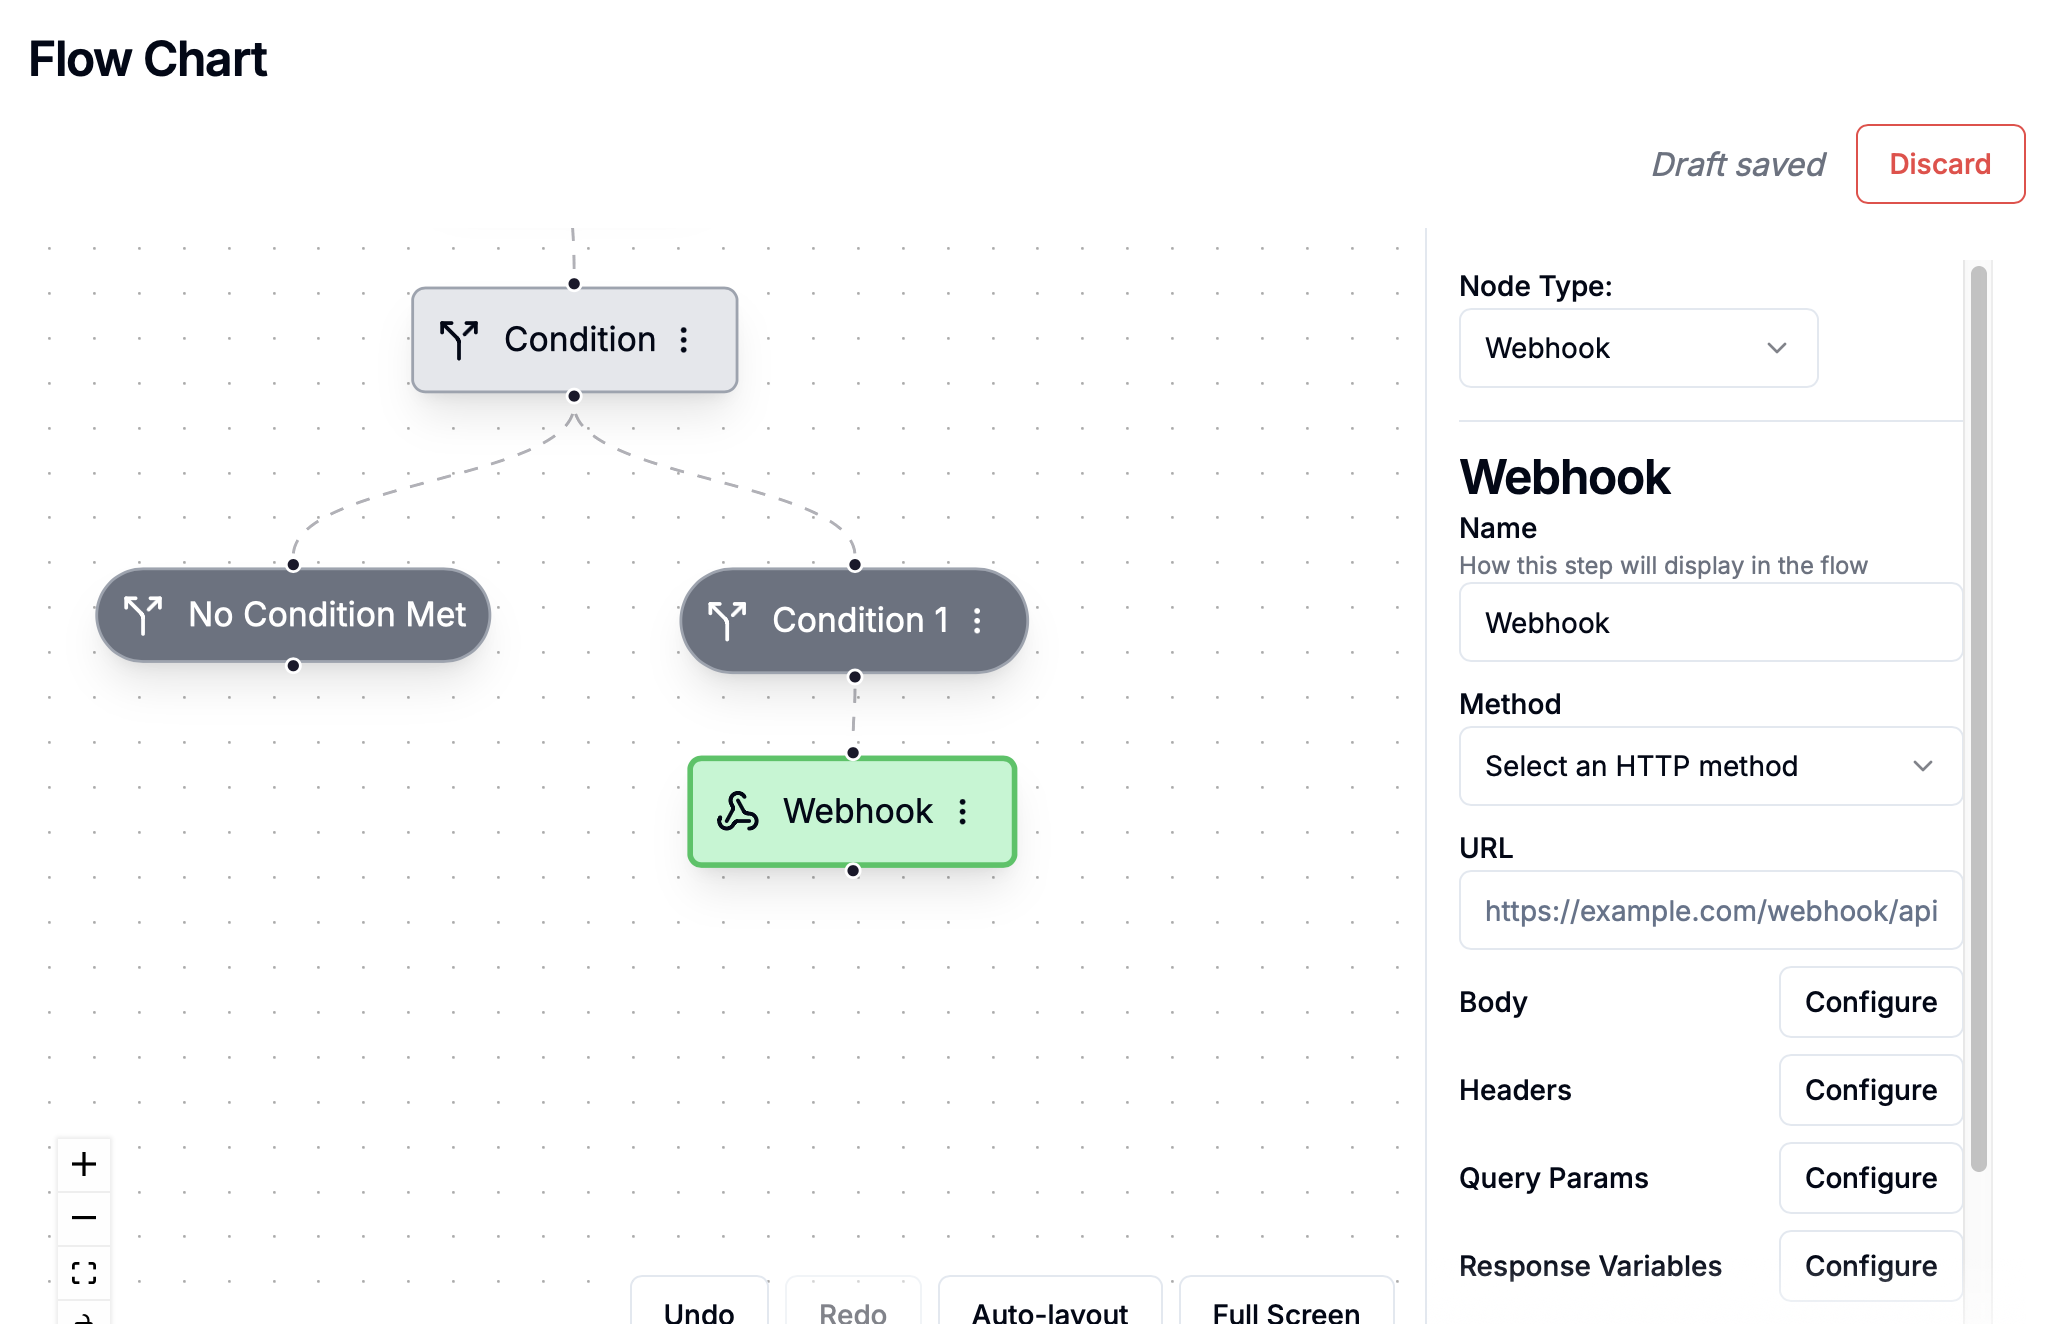
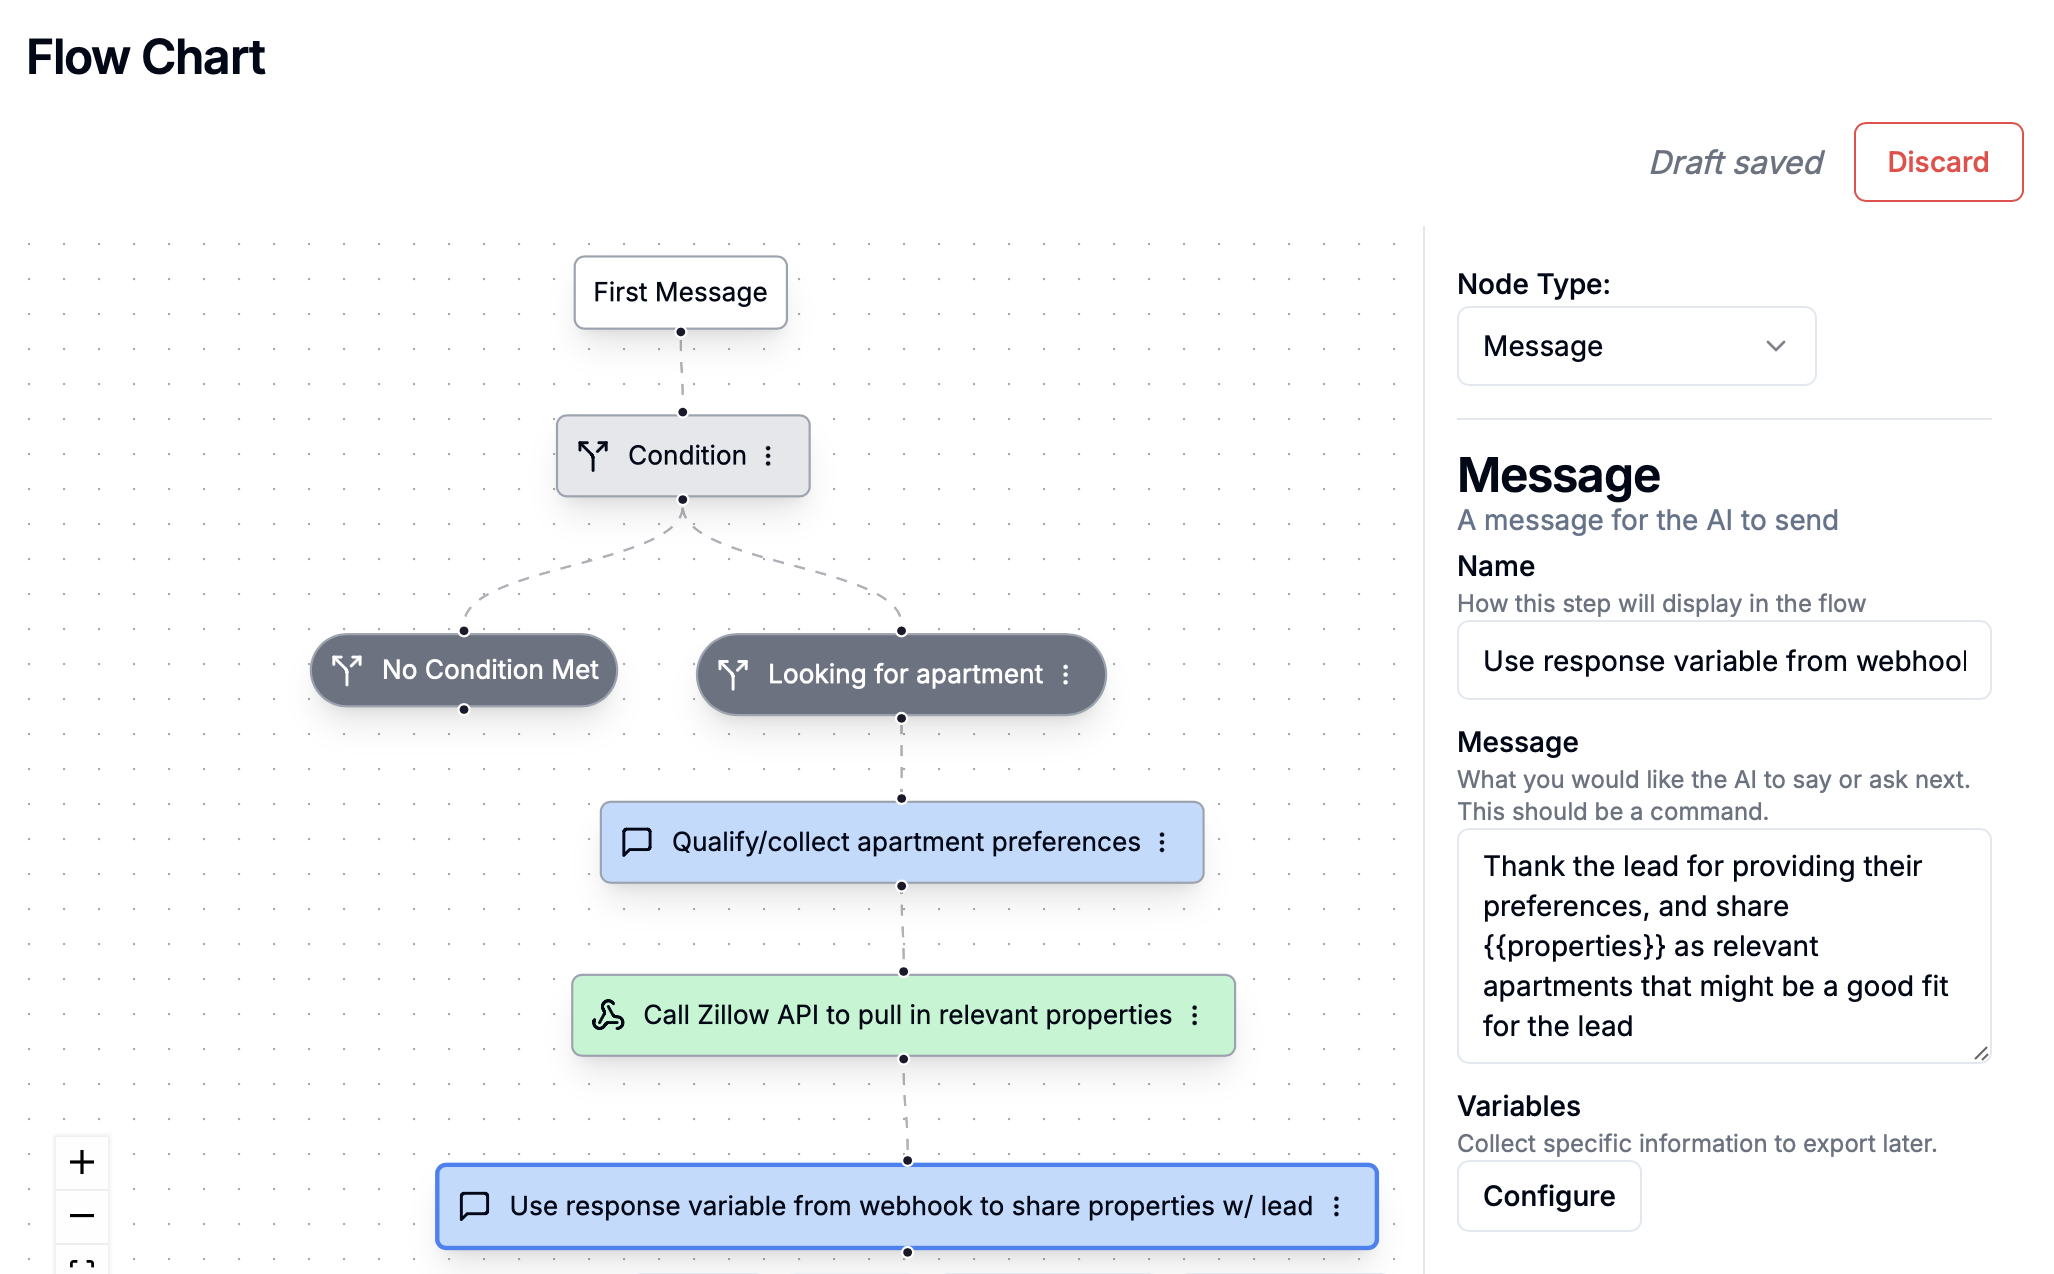
- Apten has collected apartment preferences from a lead through variables in a message node
- Plug in a Zillow API to pull in relevant properties that fit their criteria.
- Use the response variable from the webhook node step in the next message node to have Apten share relevant properties with the lead
- Apten has pre-qualified the lead to a point where they are now ready for a phone call
- Use a webhook node to pass the lead off to a dialer to connect them w/ a human.
3. Follow-up Config
This optional to configure because there’s a default follow-up schedule built into Apten, but adjusting follow-up config allows you to customize the timing and content of Apten’s follow-ups. *Note: Apten already automatically uses the context it has about a lead + any past conversations to personalize its follow-up messaging. The follow-up schedule can be customized per profile. For each follow-up step, you can customize the timing and the channel (text, call, or email).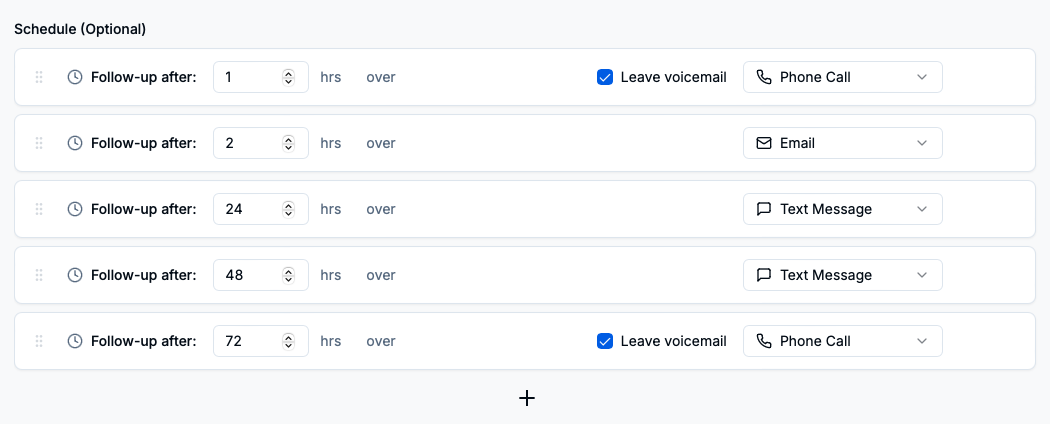
Timing
Apten will execute each follow-up step in sequential order if the lead does not respond to a message.- You can add additional steps with the ’+’ sign below, and you can customize the timing of each step.
- You can also move the order of the steps around by dragging around the 3x2 set of dots on the left of each step.
 Dynamic Follow-ups + Long-Term Followups
Both of these are already built into Apten automatically (no setup needed)
Dynamic Follow-ups + Long-Term Followups
Both of these are already built into Apten automatically (no setup needed)
-
Dynamic follow-ups: Apten is able to dynamically schedule follow-ups based on a lead’s message.
-
For example:
- If the lead says something like ‘I am traveling right now and won’t be free for the next couple of weeks’ -> Apten will automatically schedule a follow-up for 2 weeks later. This follow-up is added to the front of the follow-up schedule as an extra step.
-
For example:
- Long-term follow-ups: Apten is able to automatically determine whether it makes sense to follow-up in a shorter term timeframe or do a longer term follow-up (once per month)
Email Settings
If email features are enabled for a profile, use Sender Address to choose which verified sending domain the profile uses. This setting is available when your organization has enabled multiple sending domains.- Use organization default — the profile follows future changes to the organization’s default sender.
- A specific sending domain — the profile uses that domain’s sender address.
Other optional profile settings:
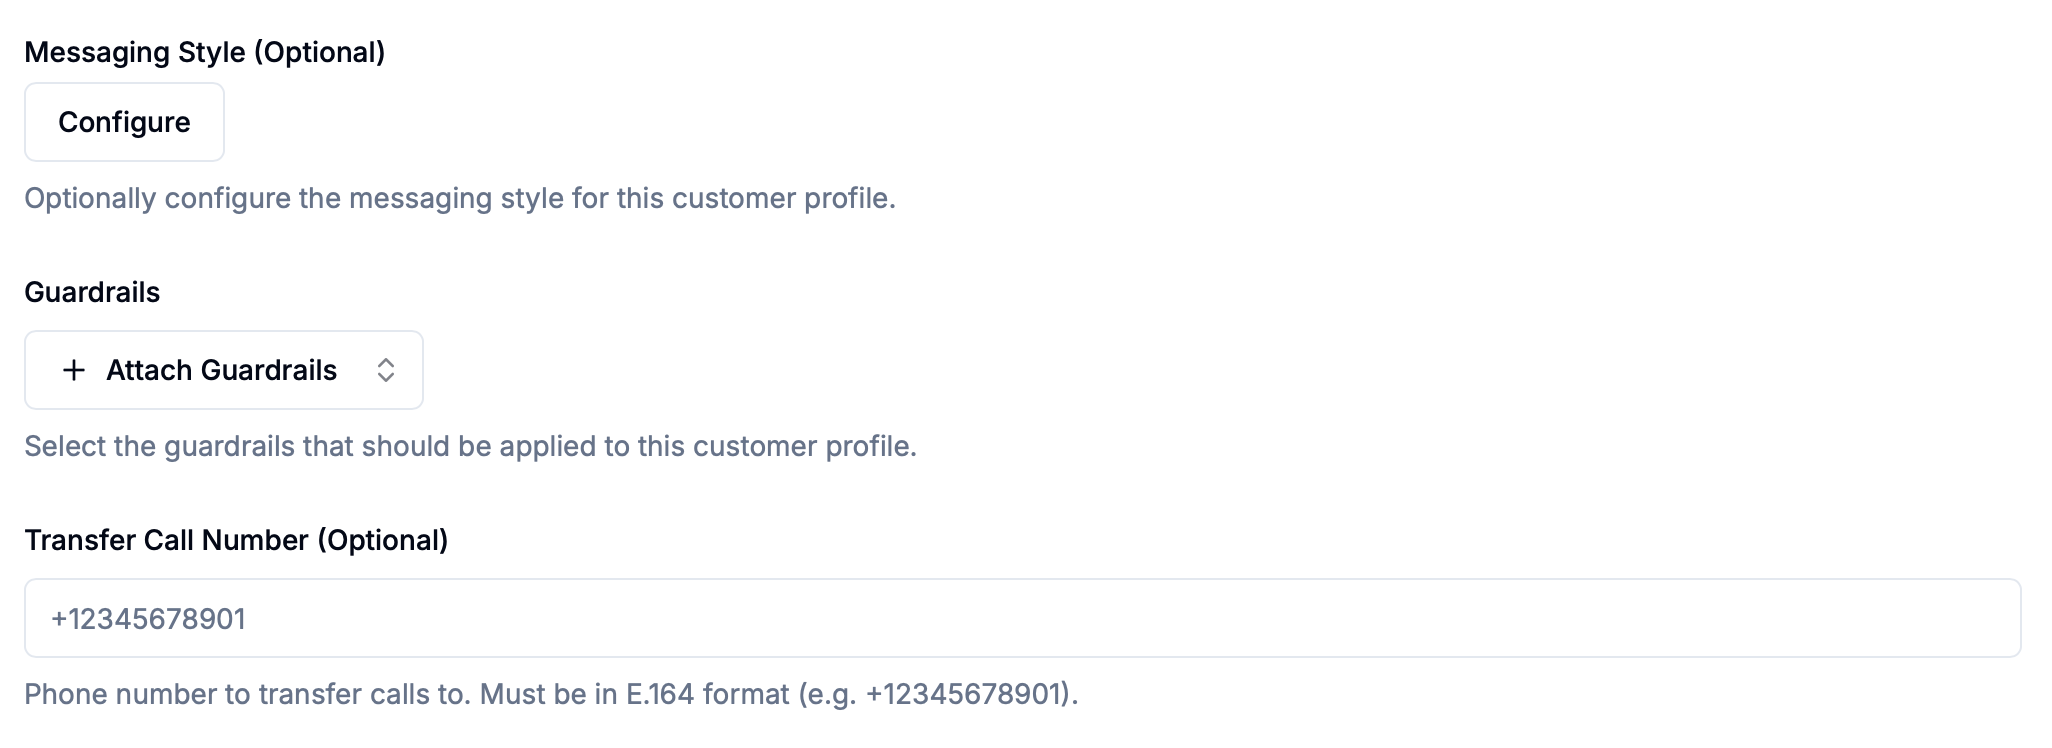
- Messaging style: customize how Apten responds (e.g. keep responses concise, friendly, etc)
- Guardrails: attach any guardrails you’ve setup to make sure AI messages follow certain guidelines/rules (see here for more info)
- Transfer call number: if you have AI voice enabled, set a number here for Apten to transfer to automatically whenever the lead wants to speak w/ a human
Profile variants
Profile variants are independent copies of a base profile that you can use to try different settings with new leads. A base profile can have up to three active variants. You can edit each variant without changing its base or the other variants.Create and edit variants
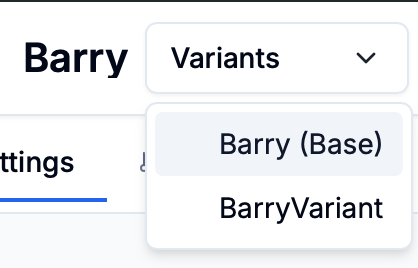
In Build & Test, open a base profile and select Variants. Choose Create a variant and enter a name. The new variant starts as a copy of the base profile. Use the profile selector at the top of the editor to switch between the base and its variants while editing.
Compare profile settings
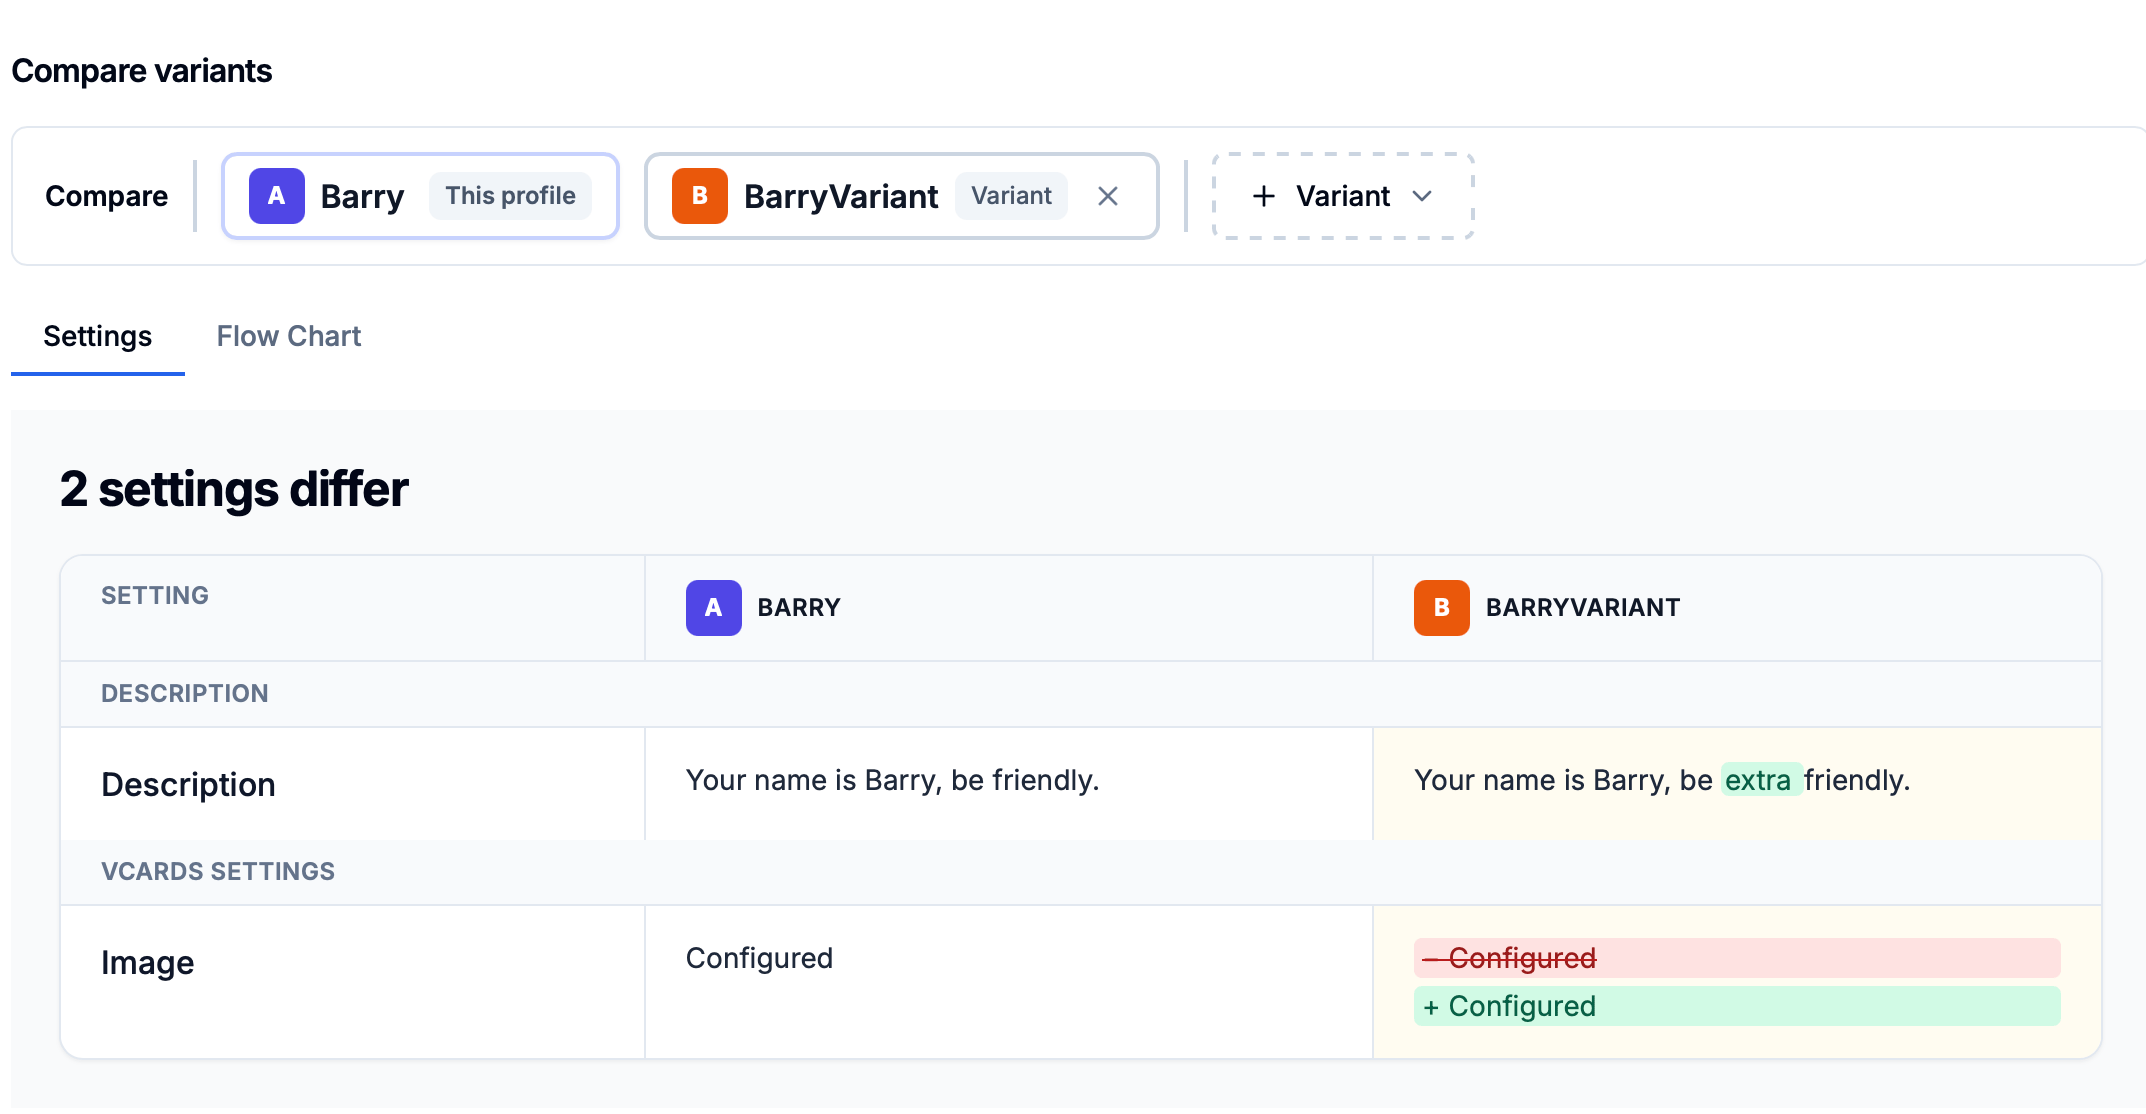
Use the Compare controls on the Variants tab to compare the base profile with selected variants. Switch between Settings and Flow Chart to inspect their configurations side by side; differences are highlighted. This view compares profile setup. For lead performance, use Optimize > Compare Profiles > Variants.
Set import weights
Set an import weight for the base profile and each active variant. The weights must total 100%, and a new variant starts at 0%. In the example below, new leads are allocated using an 80% base and 20% variant split. During Import new leads, enter the base profile name in the CSV’s Customer Profile column to use these weights. Changing weights affects new imports, not leads already assigned to a profile.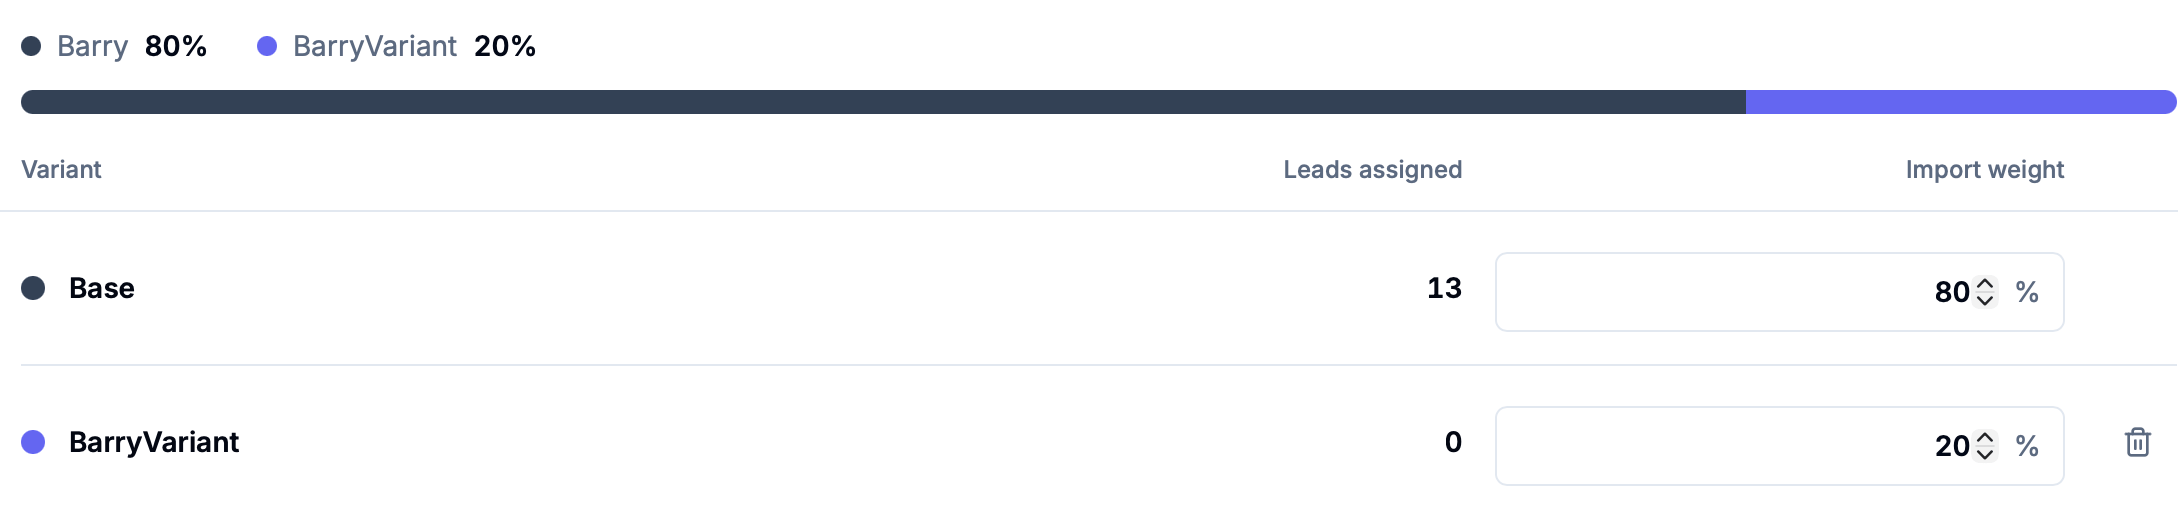
Retire and restore variants
Retire an active variant to remove it from future imports. Its import weight returns to the base profile, and existing leads stay assigned to that variant. Retired variants appear in the Retired list with their assigned-lead counts. Choose Restore to reactivate a variant; it returns at 0% import weight. A base profile can have no more than three active variants.